Converting images to text files
Scan settings
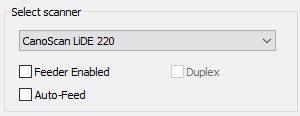
To start scanning select your scanner from list of available TWAIN devices.
If you scanner has autofeeder select Feeder Enabled checkbox and Auto-feed to automatically scan next page.
Select Duplex checkbox to scan both sides of document/picture ( if your scanner doesn't support this feature this checkbox will be disabled).
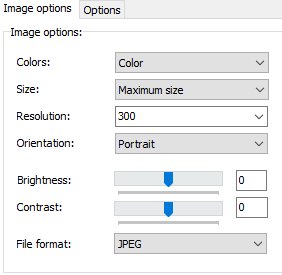
You can adjust scanning settings in the left pane of the program window:
Image options tab:
Colors: select from color, black and white, gray-scale modes. Some scanners will have additional colors models.
For example for text recognition choose black and white or gray-scale image , resolution 300 dpi and file format PNG or TIFF
Size: size or area of scanning- select from maximum size or standard document sizes like US letter, A4, A5 etc.
Resolution: select resolution (DPI) from 75 to 2400
Orientation: depending of your scanner model you can choose from Portrait, Landscape and rotate image orientations
Brightness and contrast: adjust these values if necessary
File format: choose from JPG(JPEG), PDF, TIFF, BMP or PNG formats
File settings
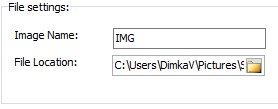
File settings: choose file name for your scanned images, for example if you choose 'IMG' name your images will be saved as
IMG_001.jpg, IMG_002.jpg
File Location: specify where images will be saved on your computer. Default option - Your 'Pictures\ScanNavigator' folder.
Files will be saved in in this folder and in subfolders with current date name - for example ..Picture\ScanNavigator\2017_05_31\
Working with scanned images

After selecting image thumbnail in the right pane of the program window buttons shown above will become active and you can start to work with scanned images
![]() Add image to workspace, you can copy image to current working folder for example for extracting text or image adjustment or to make multi-page PDF file
Add image to workspace, you can copy image to current working folder for example for extracting text or image adjustment or to make multi-page PDF file
![]() Delete selected image
Delete selected image
![]() Open image editor where you can crop, rotate, resize, apply image effects
Open image editor where you can crop, rotate, resize, apply image effects
![]()
Use this slider to adjust thumbnails dimensions in the right pane
![]()
Print scanned images, print preview dialog will be opened and you will be able to print selected or all scanned images
![]()
Opens Multi-Page PDF dialog
![]()
Opens Multi-Page TIFF dialog
![]()
Opens OCR, image to text converting window
Creating Multi-Page PDF files

You can create Multi page PDF files from all or checked images (you can choose any format images and also single PDF files)
Rearrange images using drag and drop if needed.
Specify name of Multi-Page PDF file
Select which pages must be saved (all or checked only)
You can also delete source files by selecting 'Delete source file after merging' checkbox
If check box 'Open the resulting file' is selected, resulting file will be opened in your default PDF Reader program.
You can also specify compression level and document size in this dialog.
Converting images to text files
![]()
After selecting image and clicking this button OCR window will be opened

Select language of text to recognize, you can skip images in document by selecting 'Text regions only checkbox'
You can also select a region to recognize in image pane
Engine: select from Fast, CUBE and Accurate engines. CUBE and Accurate engines are not available for some languages and they are not so fast, but produce more accurate results.
Page layout: select from various page layouts, default is Single block of text, but you can choose also fully automated page layout recognition.

After clicking recognize button, OCR will start, depending of your PC hardware it can take some time.
Options

Setting dialog allows to enable check for update on program startup, auto detect border of scanned images, skip blank pages if your scanner supports this feature.
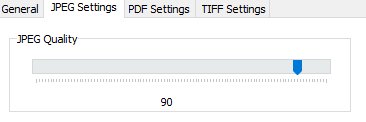
Adjust JPEG quality of saved files, value from 0 to 100, low values means smaller file size but low quality and high values will produce bigger file size and better quality
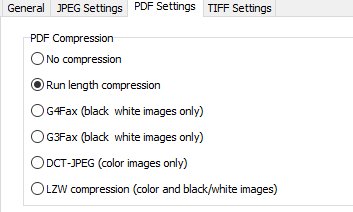
PDF compression settings for saved single and multi-page PDF files
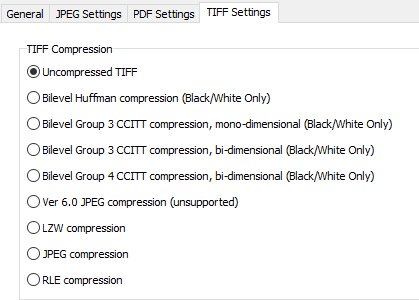
TIFF compression settings for saved single and multi-page PDF files
